Sunday, December 30, 2012

Unable to Activate Windows Store App


You developed or are in the process of developing a Windows 8 Metro app.  It compiles without error.  It runs beautifully.  You are proud of yourself, as you should be.
One day you run your Window 8 app again, and suddenly – BAM!  Your app throws the following error out of nowhere:


How can this happen?  It was running just fine the last time you worked on it.

What happened is that the developer license with which you built your app has expired.  You can try launching your app again in a moment, as the error dialog suggests, but unfortunately this error is not going to go away.

But wait!  You had already recently renewed your license, you say?  So why are you still getting this error?  As I stated earlier, the developer license with which this given app was built is expired.  Your other new apps will work fine.  You can uninstall and reinstall this app and it will work fine.  You can start a new project and copy the old code over and it will work fine.  But that may be somewhat tedious.

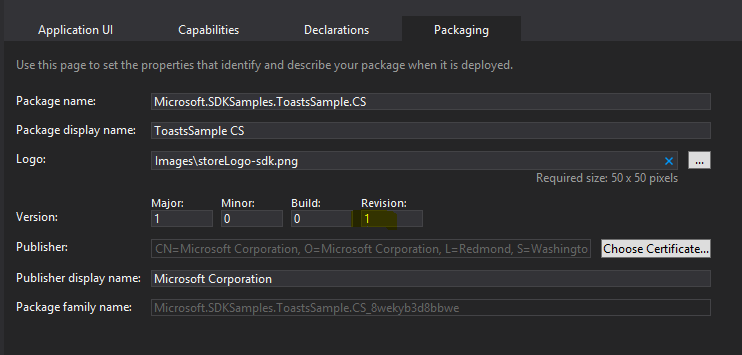
I have found an easy and painless workaround.  In the Package.AppManifest file, in the Packaging tab, you can increment either the Build or the Revision numbers. 


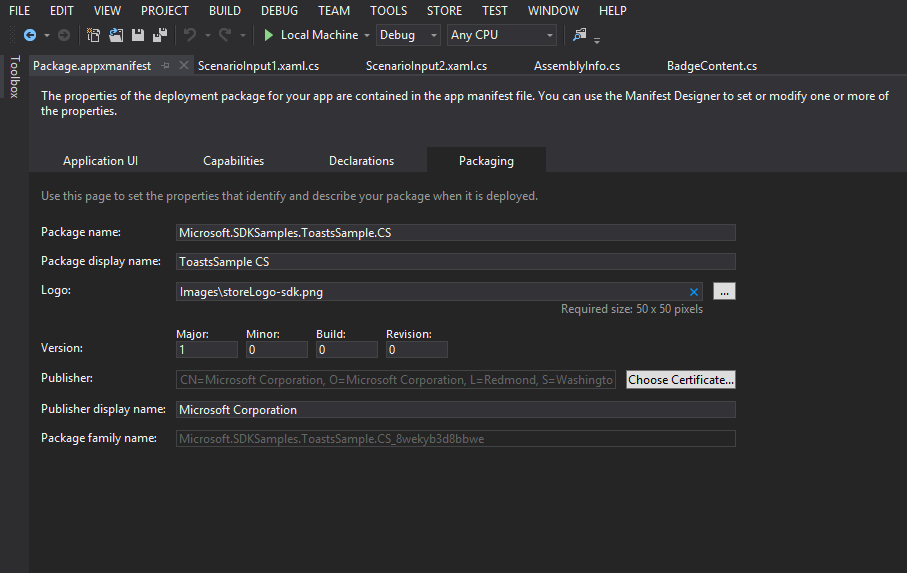
Of course you can change the Major or Minor numbers as well, but that would not be good practice.


To recap: the Windows Store App developer license is temporary; it expires after a few weeks.  When it expires, your Windows 8 app expires with it.  You will need to renew your license.  To keep your older apps operational, you can simply change the build or revision number in the package manifest.

Tuesday, August 21, 2012

Deploy your Website Using IIS 7 - Part II


In Part I of this article, I explained how you could export a package of your website from IIS 7.  If you haven’t already, please read that blog here before continuing with this blog. 

As I pointed out in that blog, it is an industry best practice that developers not have access to the production server.  To deploy a website from the Test environment to the Production environment, I would export a package of my website in the Test server.  I would then instruct the Release team (or their equivalent) to import this package into the IIS of the Production server.  All files in the package contents would be identical in both environments.

Of course, you would want to exclude the web config files and SSL Certificates and other environment-specific files from the package you export.

Here in this blog I explain how your Release team can import a package using the IIS Manager and the Web Deployment Tool in IIS 7.0 or above.

Import a Package


1.     Open the IIS Manager by clicking Start -> Run and typing INETMGR

2.     In IIS Manager, in the Connections pane, select the Server node

3.     In the right-hand Actions pane, under Deploy, click the Import Server or Site Package… link to launch the wizard


4.     Select the package that you exported from the Test server (per Part I of this article).


5.     Enter the Password used to Encrypt the Package


6.     In the Import Server or Site Package dialog, Select All the Contents of the Package


7.     Click Next


8.     Confirm the Server Package Import.  Click OK.


9.      The wizard will now complete the package installation process.  When it is complete, you will see a Summary page that provides a high-level overview of what items were installed from the package.  The Details tab will give a lot of details on exactly what was installed.  Click Finish.


That’s it.  You (or your Release team) have now deployed your website from your Test environment to your Production environment using IIS 7 Manager.


Wednesday, June 13, 2012

Deploy your Website Using IIS 7 - Part I

As an industry best practice, developers should not have access to the Production server.  Developers can use Dev servers as their playground and build any number of proofs-of-concept.  And developers can perform any number of tests on the Test servers.  But, while developers need to deploy websites from the Test environment to the Production environment, they need not be granted direct access to the Production servers.

There are a number of ways to deploy a website to the secure Production environment.  My prefered method is to export a package of my website from IIS 7 in the Test server.  I can then import this package into the IIS 7 of the Production server.  All files in the package contents would be identical in both environments. 

Of course, you would not want the web config files in one environment to be copied to the other.  The same is true for SSL Certificates and other environment-specific files.  Not to worry: you can exclude them from the package you export.

This blog will help you create a package of your website using the IIS Manager and the Web Deployment Tool in IIS 7.0 or above.

Export a Package


1. Always make a backup of your Production web server, in case a website deployment to Production fails, and a rollback becomes necessary.  Run the following command to backup the IIS server:
%windir%\system32\inetsrv\appcmd add backup “PreMsDeploy”

2. Open the IIS Manager by clicking Start -> Run and typing INETMGR

3. In IIS Manager, in the Connections pane, select the Server node

4. In the right-hand Actions pane, under Deploy, click the Export Server Package… link to launch the wizard


5. In the Export Server Package dialog, Select All the Contents of the Package


6. Click Next

7. In the Select Parameters dialog, select no parameters.  Click Next


8.  In the Save Package dialog, click the Browse button to choose a location to save your exported package.  The Package name must have a ZIP file extension.  For this example, “2012-07-09 IISBackup.zip” is used


9. Enter the Encryption Password


10.  The wizard will now complete the packaging process and save the package to disk.  When it is complete, a Summary page documents an overview of what actions were performed.  Click Finish.


That's it.  You have now created an exported package of your website using IIS 7 Manager.

In Part II, we will walk through the steps to import this package from the Test server into the Production server.


Tuesday, June 12, 2012

ASP.NET SQL Server Database Installation

Beginning with the .NET Framework 2.0, ASP.NET has a rich new infrastructure that provides for a number of built-in features that would otherwise cost developers a lot of time and effort to build on their own.  These features include Membership, Role Management, Profiles, Web Parts Personalization, and Health Monitoring, among others.

To avail of these features, we will first need to install the Microsoft SQL Server database used by the SQL Server providers in ASP.NET.  We can use the ASP.NET SQL Server Registration Tool to
create this SQL Server database called ASPNETDB. 

The ASP.NET SQL Server Registration Tool file name is ASPNET_REGSQL.EXE

Pre-Requisites


The Pre-Requisites for running this tool include the following:

   a) Set execution policy (beyond machine default)
       e.g. set-executionpolicy -scope CurrentUser -executionPolicy Undefined

   b) .Net Framework 2.0 or later

   c) Installation User must be a DBO Sysadmin on SQL Server Instance (install creates a database)

Installation Procedures


As a best practice, you should run the ASP.NET SQL Server Registration tool from the Database server – not the Web server. 
The Aspnet_regsql.exe file is located in the [drive:]\%windir%\Microsoft.NET\Framework\v4.0.30319 folder on your server.

You can run Aspnet_regsql.exe without any command-line arguments to run a wizard that will walk you through specifying connection information for your SQL Server installation, and installing the database elements for the Membership, Role Management, Profile, Web Parts Personalization, and Health Monitoring features.

The wizard will walk you through the following steps:


Click Next.


Click Next.


Enter the Server info and authentication info and keep the Database <default> value.  Click Next.
Follow the rest of the wizard steps until completion.

Verification Procedure


To verify the success of the installation of the ASP.NET Database, you may do the following steps.

1) Go to SQL Server Management Studio

2) Log in to the appropriate database server


3) Verify that the tables in the image below exist.


4) Run a simple query against the dbo.aspnet_Users table to test the connection.  If no errors are thrown, then the installation was successful

Monday, June 11, 2012

Test HTTPS in your Test Environment

Most public websites today support the HTTPS protocol to communicate securely with their web users.  Such websites have an SSL (Secure Socket Layer) Certificate installed on their production web server.  If you are building a website that would implement the HTTPS protocol, then it would make sense to implement HTTPS in your Development environment and your Test environment as well as your Production environment. 
In your Dev and Test environments, you can use a mock (self-signed) SSL certificate.  But for your Production environment, you will need an SSL certificate from a Certification Authority like VeriSign or GoDaddy.
To implement HTTPS in your Dev or Test environment, you can perform the following steps.

1)     In IIS Manager, at the server level, in the Features View, select the Server Certificates feature.
                                              

2)     In the Actions pane, double-click Create Self-Signed Certificate

3)     Enter a name like MyWebDevCertForIIS or MyWebTestCertForIIS


4)     Back in the Connections pane, select your website, and in the Actions pane, under Edit Site, double-click Bindings


5)     Click Add to add a Binding
 
6)     In the Add Site Binding dialog, select https type, port 443 and the appropriate SSL Certificate (i.e. MyWebDevCertForIIS)

7)     The web application now has the correct protocol bindings